2022-01-07: Fixed some syntax issues to make it easier to read
Scope of application
It can be used to rescue, expand, and restore the original system of Nokia 8110 4G.
Note!!! This tutorial only provides the EDL package for TA-1059, TA-1048 is not applicable until you get the EDL package for this model.
Preparation
Windows 7 (recommended, with driver signature verification turned off).
Windows 10 can be tried using the following Batch script (also with driver signature verification turned off)USB 2.0 interface (required) USB 3.0 tested unsuccessful
QPST Tool, ADB
Engineering Cable (optional)
All resources for this tutorial:
1 | 天翼云盘: |
Flashing
Step 1: Preparation
First, you need to install the driver, the driver installation package named Qualcomm USB Driver V1.0.exe, after installation, please reboot your system and press F8 before the system boots, select Disable driver signature enforcement (Windows 7).
For Windows 10 please select Settings --> Update and Security --> Restore --> Advanced Startup --> Reboot Now and select Troubleshooting --> Advanced Options --> Startup Settings --> Reboot, then press F7 (i.e. Disable driver signature enforcement).
Step 2: Enter EDL mode
You have three ways to enter EDL mode.
Turn off the phone completely, preferably take out the battery and discharge it for about 10 seconds and then put it back into the battery, press and hold the up arrow key and down arrow key and then press and hold the on button in the off state, at this time the KaiOS logo of the boot will flash for a while and then black screen, at this time plug the USB cable into the computer, display
QHSUSB_DLOADinOther Devicesin the device manager or inPort (COM and LPT )displaysQualcomm HS-USB QDLoader 9008 (COMx)(The value of COMx is not fixed and is based on QFIL).In the boot state, start USB debugging (enter
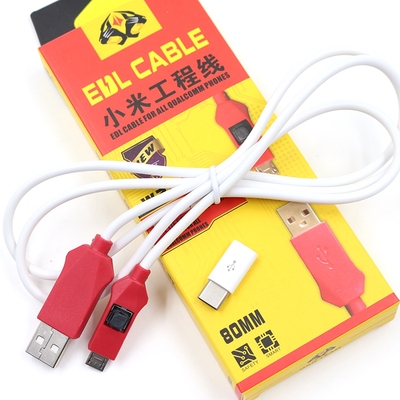
*#*#33284#*#*on the keypad), plug in the computer after the debug icon is displayed, and enteradb reboot edl.Purchase the microUSB EDL cable, plug it into the computer in the off state and press the button on it, the EDL cable style is as shown.
Step 3: Install QPST Tool
Before installing QPST Tool, please install Qualcomm USB Driver V1.0.exe which is Qualcomm USB driver.
Once the driver is installed, you can install QPST Tool.
Step 4: Flashing device
After installing QPST Tool, find QPST --> QFIL in the start menu to open the QFIL, click Select Port to select Qualcomm HS-USB QDLoader 9008 (COMx), select Flat Build in Select Build Type, after that Unzip the package, select prog_emmc_firehose_8909_ddr.mbn in Select Programmer, then click Load XML ... under Select Flat Build. you will be asked to select two XML files, first select rawprogram0.xml from the package and then select patch0.xml.
Finally, click Download to start flashing.
It is better not to move any device during the flashing process, the Status will return Waiting for reset done.... and the progress bar does not move for a long time, you can unplug the USB cable, take out the battery and then install it back on.
If the progress bar is finished soon, please check Status to see if there is Download Fail! information, if there is, please check the driver and cable and interface.
We doesn’t recommended to flash under Windows 10, because some computers using USB2.0 interface have compatibility problems.
Of course, you can also try the fix-usb3.0.bat script in the cloud disk (need to execute with administrator privileges).
It is recommended to flash under Windows 7.
Step 5: Booting
Press and hold the Up-arrow key and Power key to enter Recovery, select Wipe data/factory reset and press the return key to confirm to restore factory settings, select Wipe cache to clear the cache partition.
Finally, select Reboot system now to enter the system.